
Requirements
To extract SSIS metadata, Collate needs the following:- SSIS package files (
.dtsx): Required. Collate reads pipelines, tasks, and lineage from the package definitions. Store them in an Amazon S3 bucket, an Azure Blob Storage container, or a local projects path. For more information, see Package Storage Permissions. - SSIS catalog (
SSISDB) connection: Optional. Collate reads pipeline run history fromSSISDB. Without it, the connector runs in file-only mode. Collate still ingests pipelines, tasks, and lineage, but not pipeline status. For more information, see SSISDB Permissions. APIPermission (while creating the user, from Admin > User)
SSISDB or to the package storage.
SSISDB Permissions
The connector reads projects, packages, and run history from the SSIS catalog (SSISDB). The catalog.* views only return objects the login has permission on. A login without these permissions passes Test Connection. Collate then ingests the pipelines from the package files, but no run history.
Grant the connector’s login the following permissions in SSISDB:
- A database user in
SSISDBmapped to the login. ssis_logreaderdatabase role: reads projects, packages, executions, and task statistics (catalog.projects,catalog.packages,catalog.executions,catalog.executables,catalog.executable_statistics).READandREAD_OBJECTSon every SSIS catalog folder: reads the folder (catalog.folders) and the projects in it.READ_OBJECTSalso lets the login export the projects, as described in Get the SSIS Package Files.
ssis_admin or sysadmin must run the grants below with Windows authentication. catalog.grant_permission rejects SQL Server logins and the sa login.
YourUser is the database user in SSISDB, which can differ from the login name. Check it under SSISDB > Security > Users.
You can also grant the folder permissions in SQL Server Management Studio (SSMS): open Integration Services Catalogs > SSISDB, right-click a folder, select Properties > Permissions, add the user, and select Read and Read Objects.
Note: Folder permissions apply only to folders that exist when you grant them. Repeat the grant for folders created later, or add the login to the
ssis_admin role. ssis_admin can also deploy and delete projects, so the folder grants are the least-privilege option.Package Storage Permissions
The connector lists every object in the configured bucket, container, or folder and downloads each.dtsx file. It needs list and read access, nothing more.
Amazon S3
Attach the following AWS Identity and Access Management (IAM) policy to the user or role in the connection. Replaceyour-ssis-bucket with your bucket name.
Note: The connector reads packages from the first bucket in Bucket Names only. Put all SSIS packages in one bucket.
Azure Blob Storage
The connector signs in to Azure as a Microsoft Entra ID App Registration (service principal) and reads one container. Assign the App Registration the Storage Blob Data Reader role on the container. This is the least-privilege option. Assigning the role on the storage account also works, but grants read access to every container in it.Note: The Azure Reader role is not enough. Reader grants access to the storage account settings, not to the blobs. The connector needs a data role such as Storage Blob Data Reader. Storage account keys and shared access signature (SAS) tokens are not supported.
- Go to Microsoft Entra ID > App registrations and click New registration. Enter a name and click Register.
- On the Overview page, copy the Application (client) ID and the Directory (tenant) ID.
- Go to Certificates & secrets > Client secrets and click New client secret. Copy the secret Value. Azure shows it only once.
- Open the storage account, go to Data storage > Containers, and select the container that holds the SSIS packages.
- Select Access Control (IAM) > Add > Add role assignment.
- Select the Storage Blob Data Reader role, then select the App Registration under Members, and click Review + assign.
AuthorizationPermissionMismatch.
To verify access, sign in as the App Registration and list the container. The command must list your .dtsx files:
Note: On a Data Lake Storage Gen2 account (hierarchical namespace enabled), you can grant Portable Operating System Interface (POSIX) access control lists (ACLs) instead of the role: Read and Execute (
r-x) on the container root and every folder, and Read (r--) on every .dtsx file. Add the same entries as default ACLs so new folders and files inherit them.Note: If the storage account restricts public network access, allow the network that the ingestion runs from under Networking > Firewalls and virtual networks.
Local Projects Path
The user that runs the ingestion workflow needs read permission on the folder and all of its subfolders. The connector follows symbolic links to folders.Get the SSIS Package Files
SSISDB stores run history only. Task dependencies and lineage come from the package definitions: the.dtsx XML files. Provide them in one of the following ways:
- Source control: Copy the Visual Studio (SQL Server Data Tools) solution folders as they are.
- Export from the SSIS catalog in SSMS: Under Integration Services Catalogs > SSISDB > folder > Projects, right-click the project and select Export. SSMS saves an
.ispacfile. An.ispacis a zip archive: rename it to.zipand extract it to get the.dtsxfiles. - Export from the SSIS catalog with T-SQL:
catalog.get_projectreturns the same.ispacas binary, so you can script the export of every project:This requiresREADon the project, whichREAD_OBJECTSon its folder provides, or membership inssis_adminorsysadmin. - Packages stored in msdb: SSMS shows packages that use the package deployment model under Connect > Integration Services > Stored Packages. Right-click a package and select Export Package.
.ispac are URL-encoded, for example Load%20Customers.dtsx. Decode them after you extract the files.
Note: The connector cannot parse packages saved with the
EncryptAllWithPassword or EncryptAllWithUserKey protection level, because the whole package body is encrypted. The default EncryptSensitiveWithUserKey level encrypts only sensitive values such as passwords, and the connector parses those packages.Note: The Integration Services Catalogs node appears in SSMS Object Explorer only when you connect with Connect > Database Engine. If the
SSISDB database is listed but the node is not, ask your database administrator (DBA) to export the projects or grant the permissions above.Package Folder Layout
Any folder layout works. The connector finds.dtsx files at any depth of the bucket, container, or folder, so all of the following are read:
- The connector skips files inside Visual Studio
objfolders, because they are build copies of the real packages. - If the same package (the same
DTSID) appears in more than one place, the connector ingests the first copy in path order and skips the others. - The connector ingests every other
.dtsxfile in the location. Keep packages you do not want in Collate in a different bucket, container, or folder.
Metadata Ingestion
To ingest metadata from SSIS, you need to create a service connection. The service connects SSIS with Collate. Once you create a service, Collate automatically starts ingesting metadata.Step 1: Add New Service
Open the Services page and start a new service.-
Navigate to Settings > Services and select the Pipelines service.
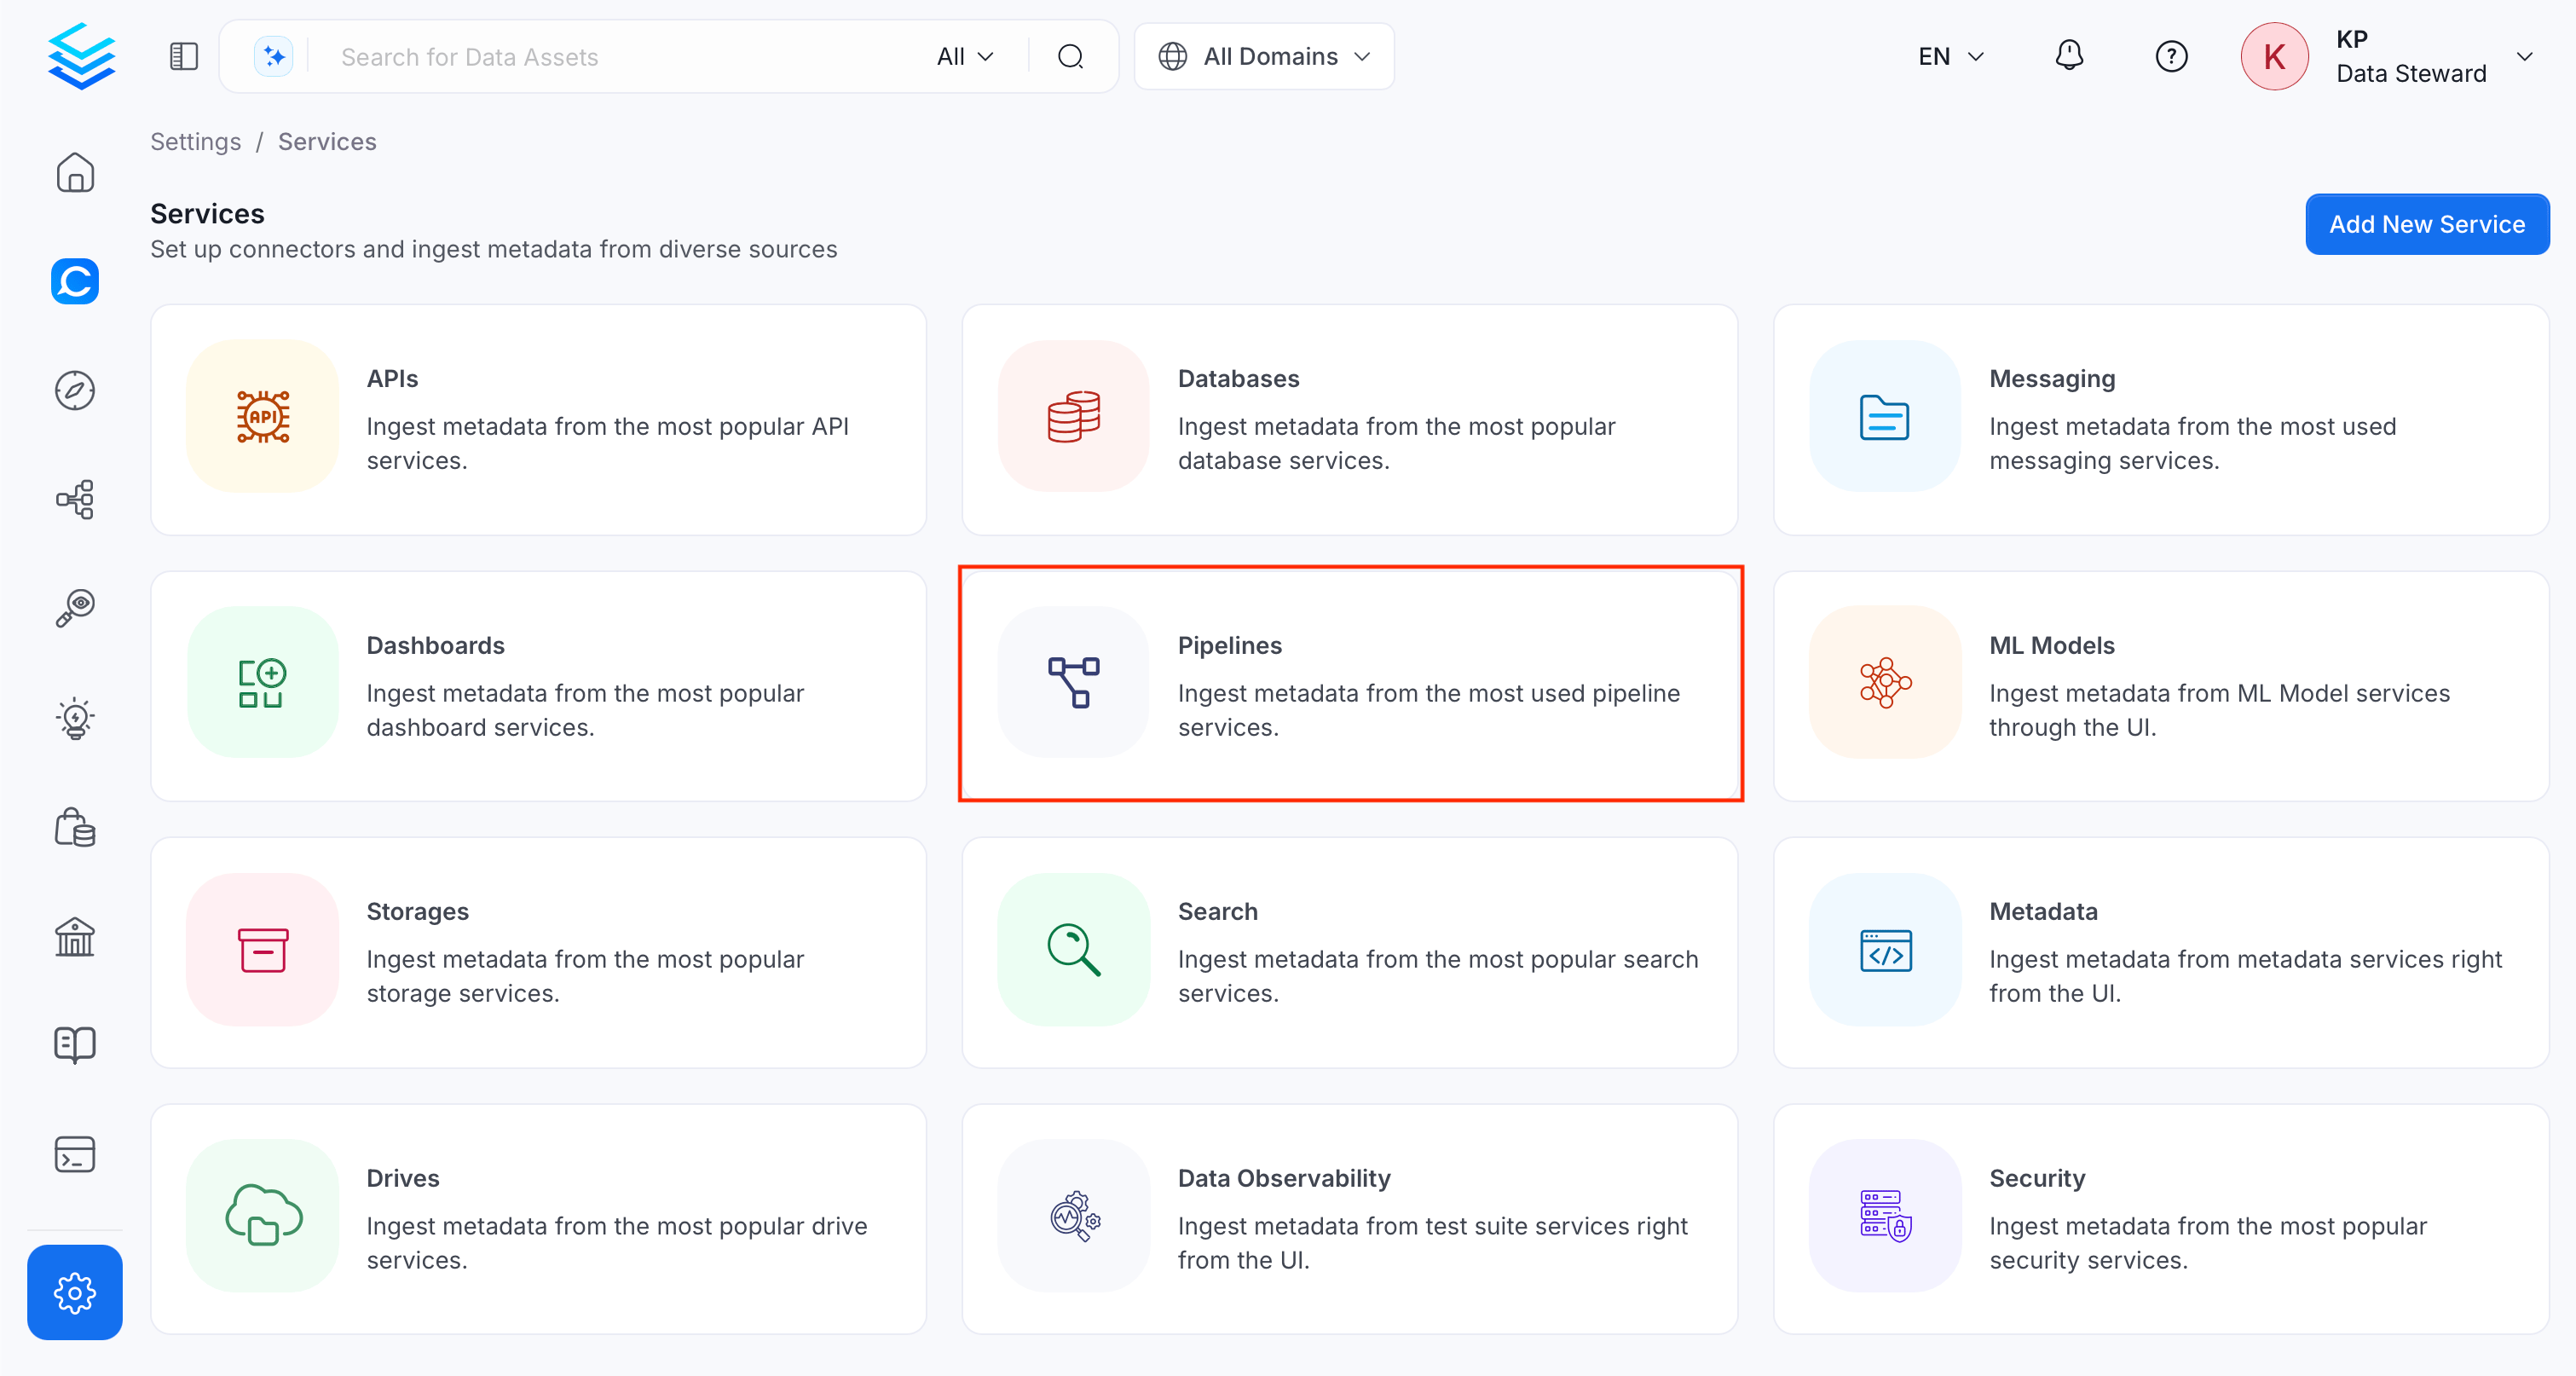
-
Click Add New Service.
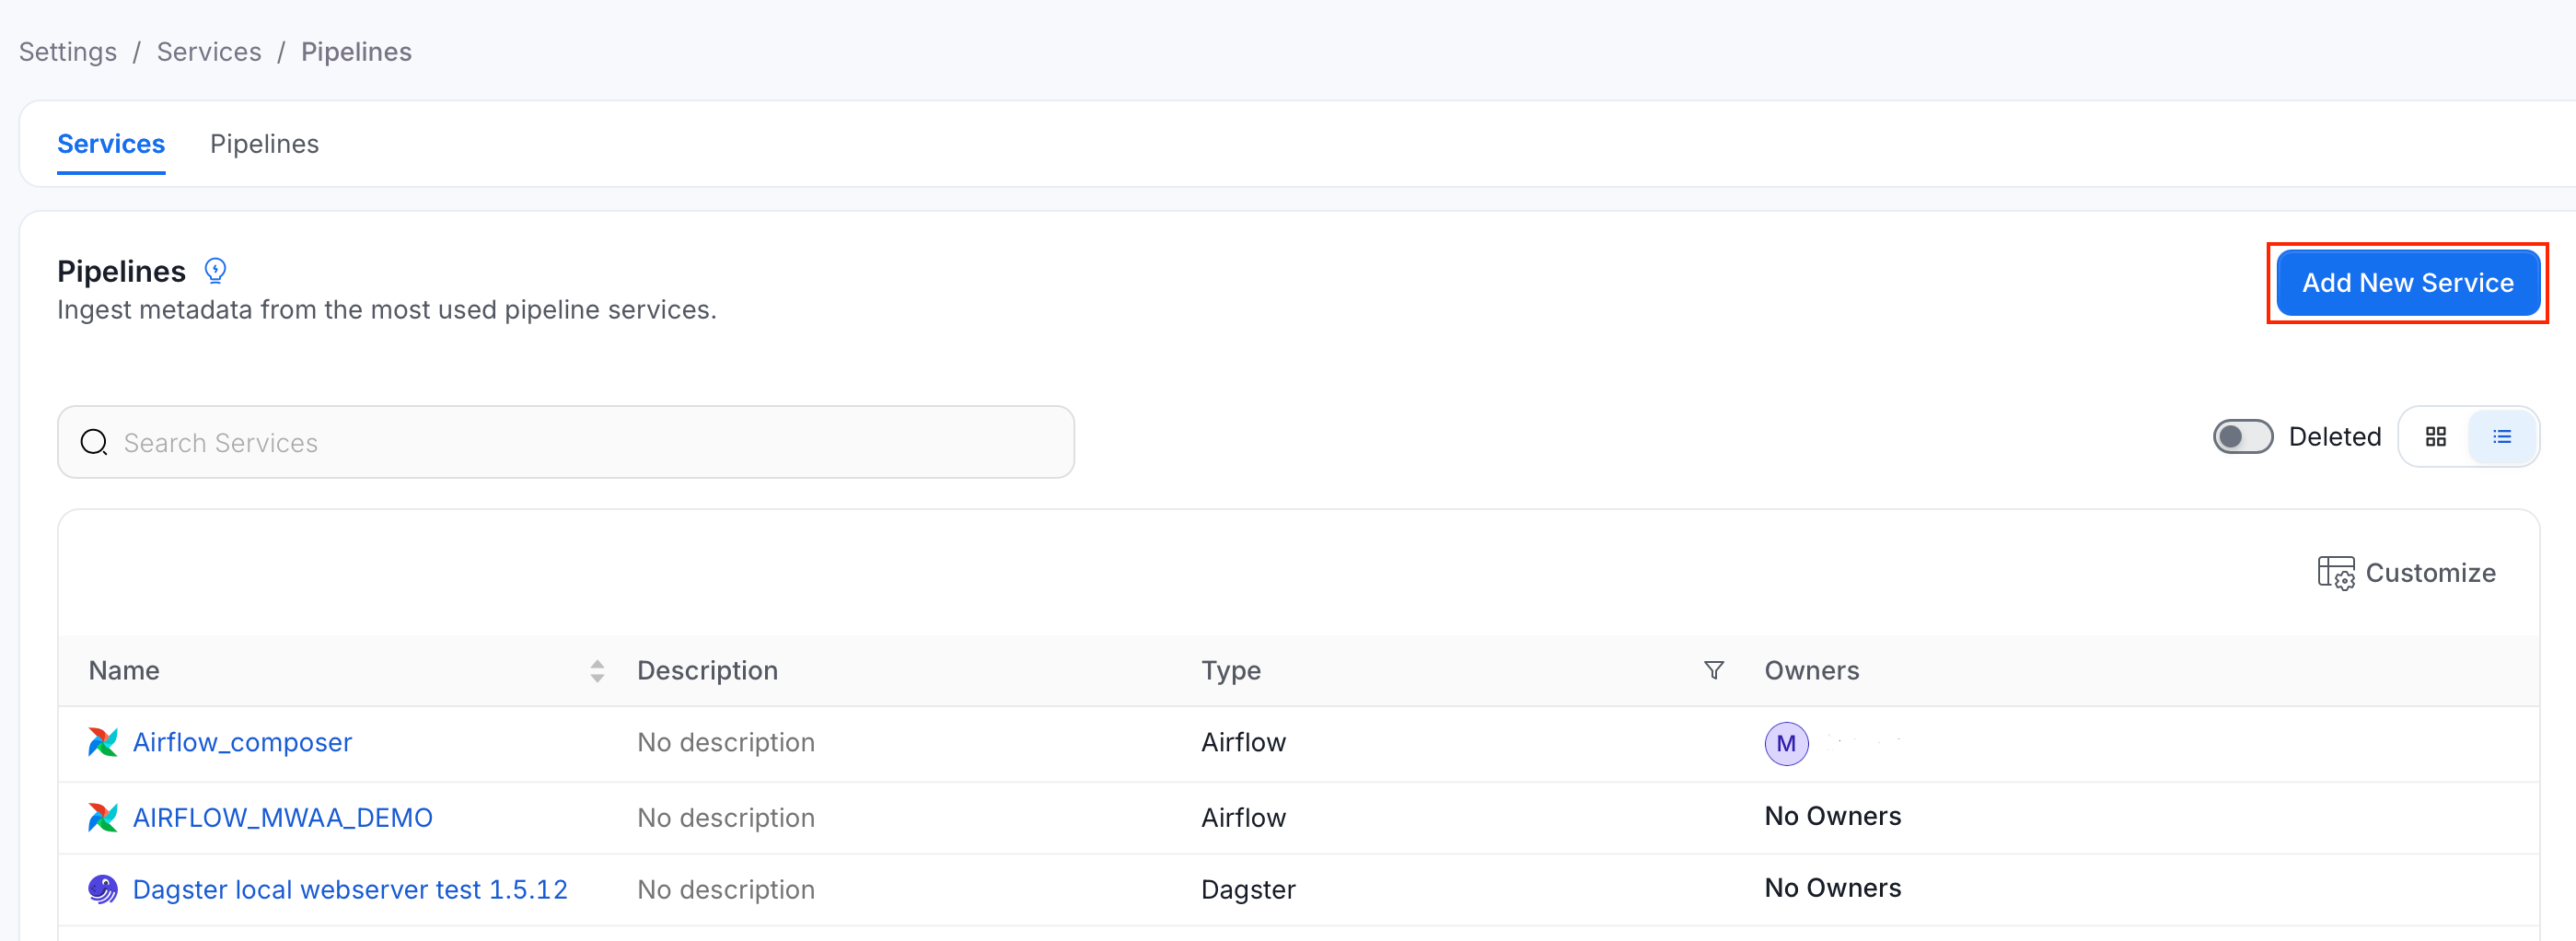
Step 2: Select a Service and Connector
From the service type dropdown, select Pipeline Services, then click the SSIS connector tile.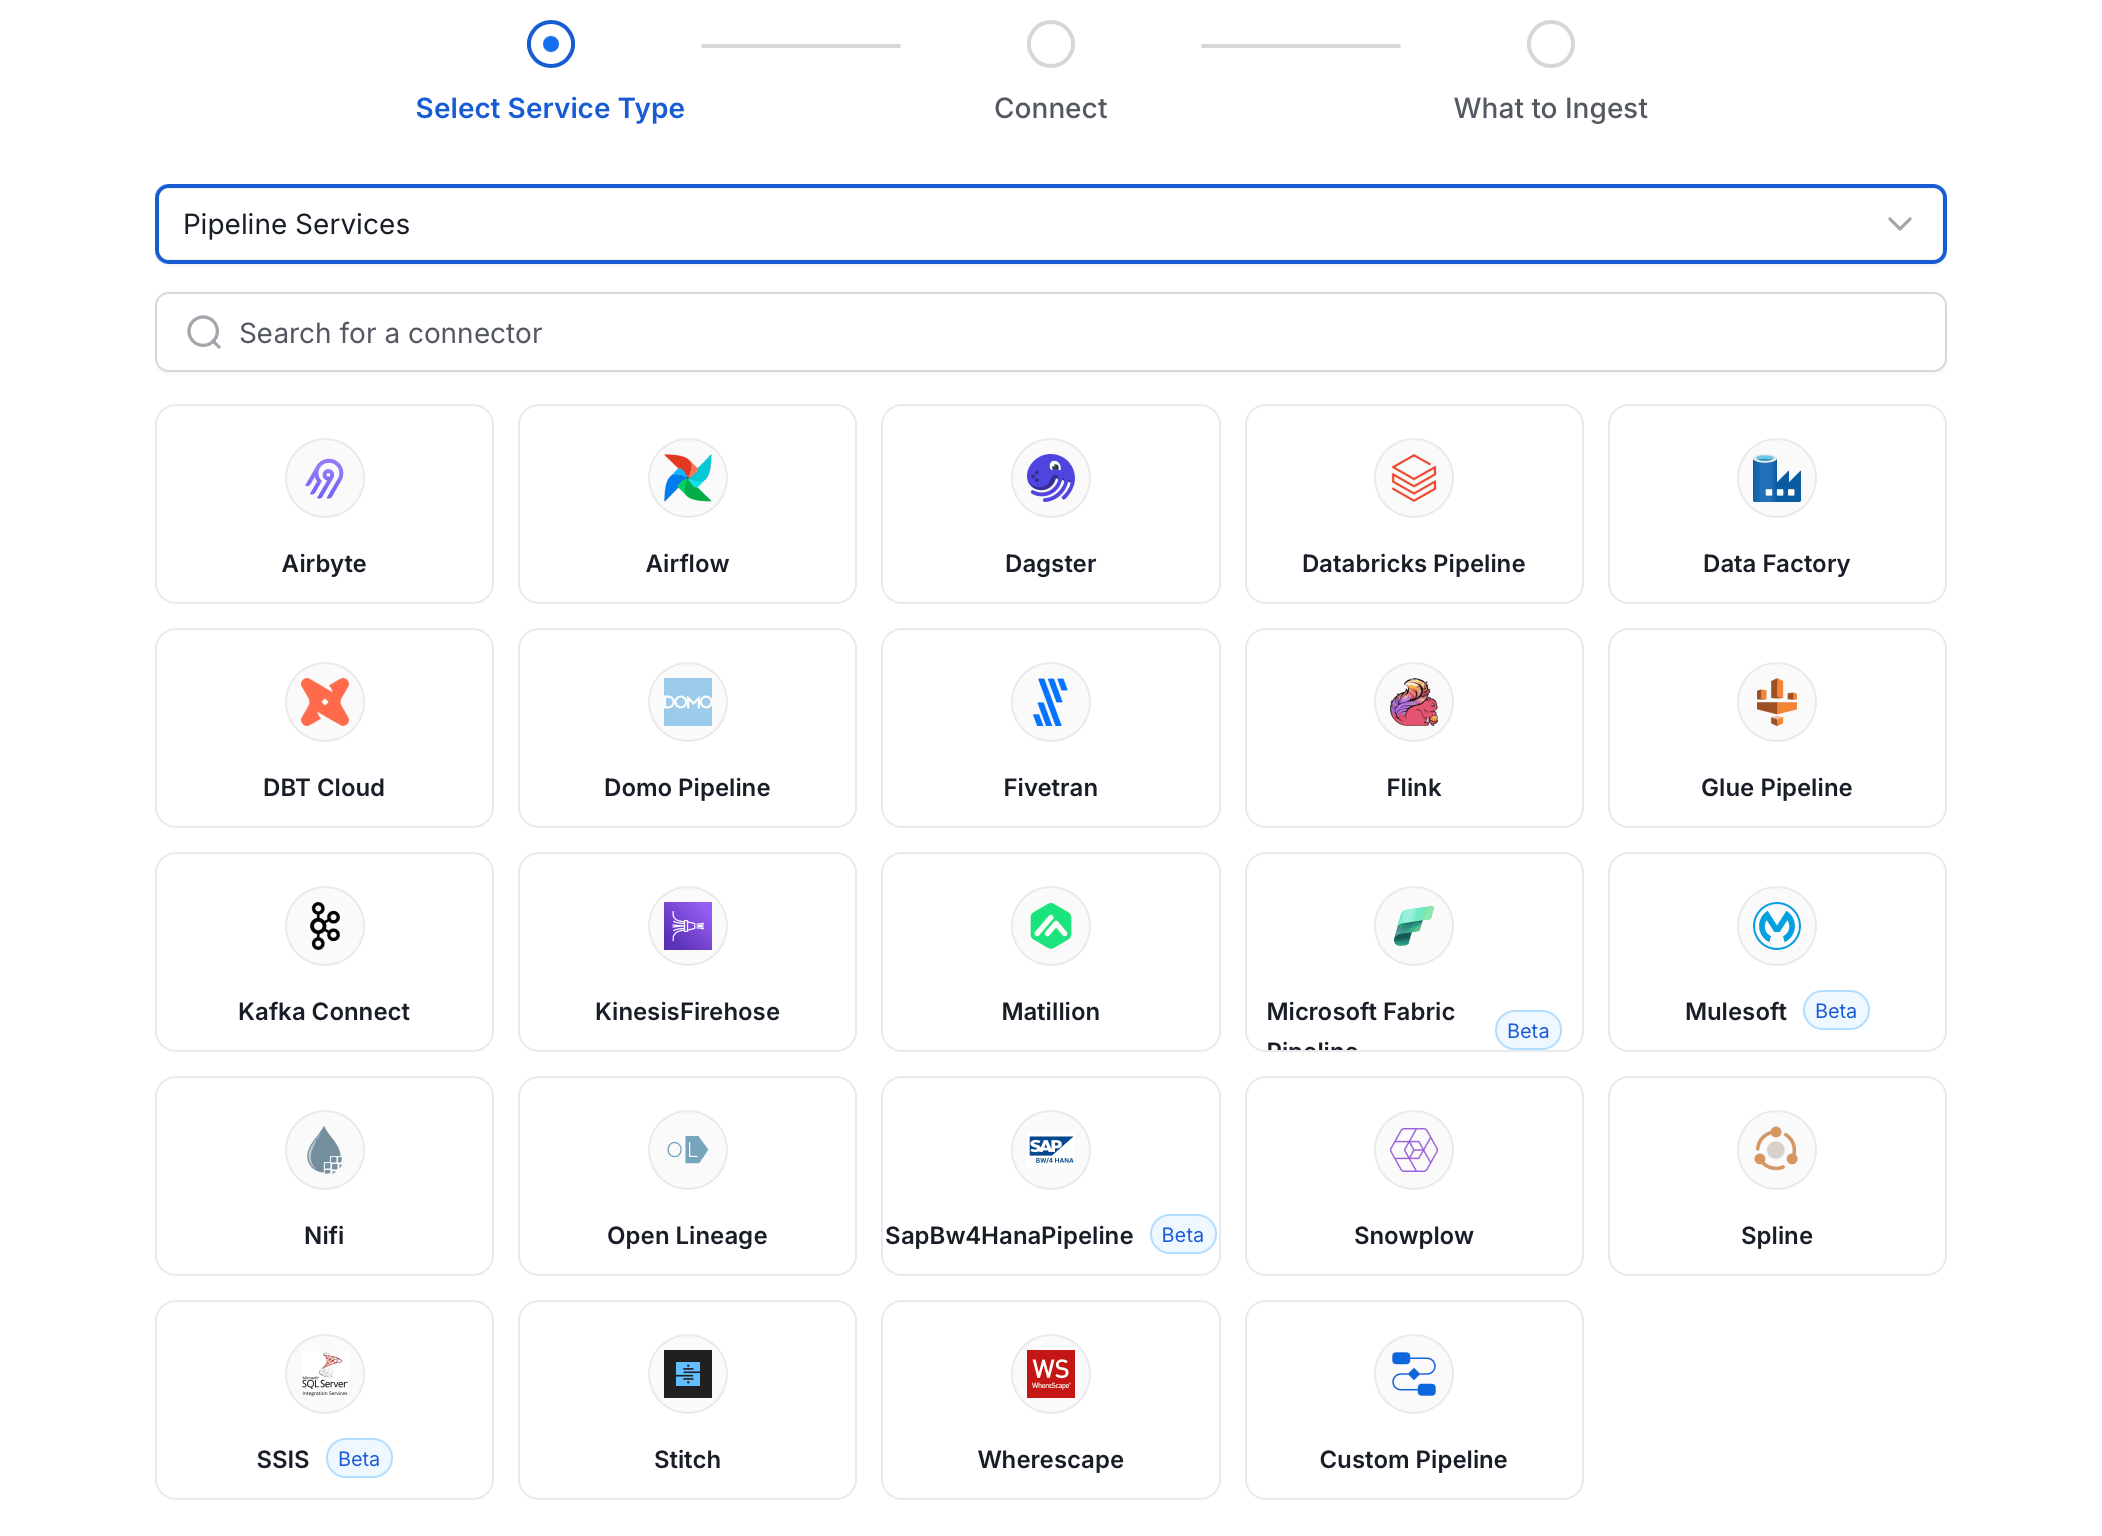
Step 3: Add Service Name and Description
- Enter a unique, descriptive Service Name. Collate identifies services by their service name. Enter a name that distinguishes this deployment from other SSIS services you are ingesting metadata from.
- Optional: Enter a Description for the service.
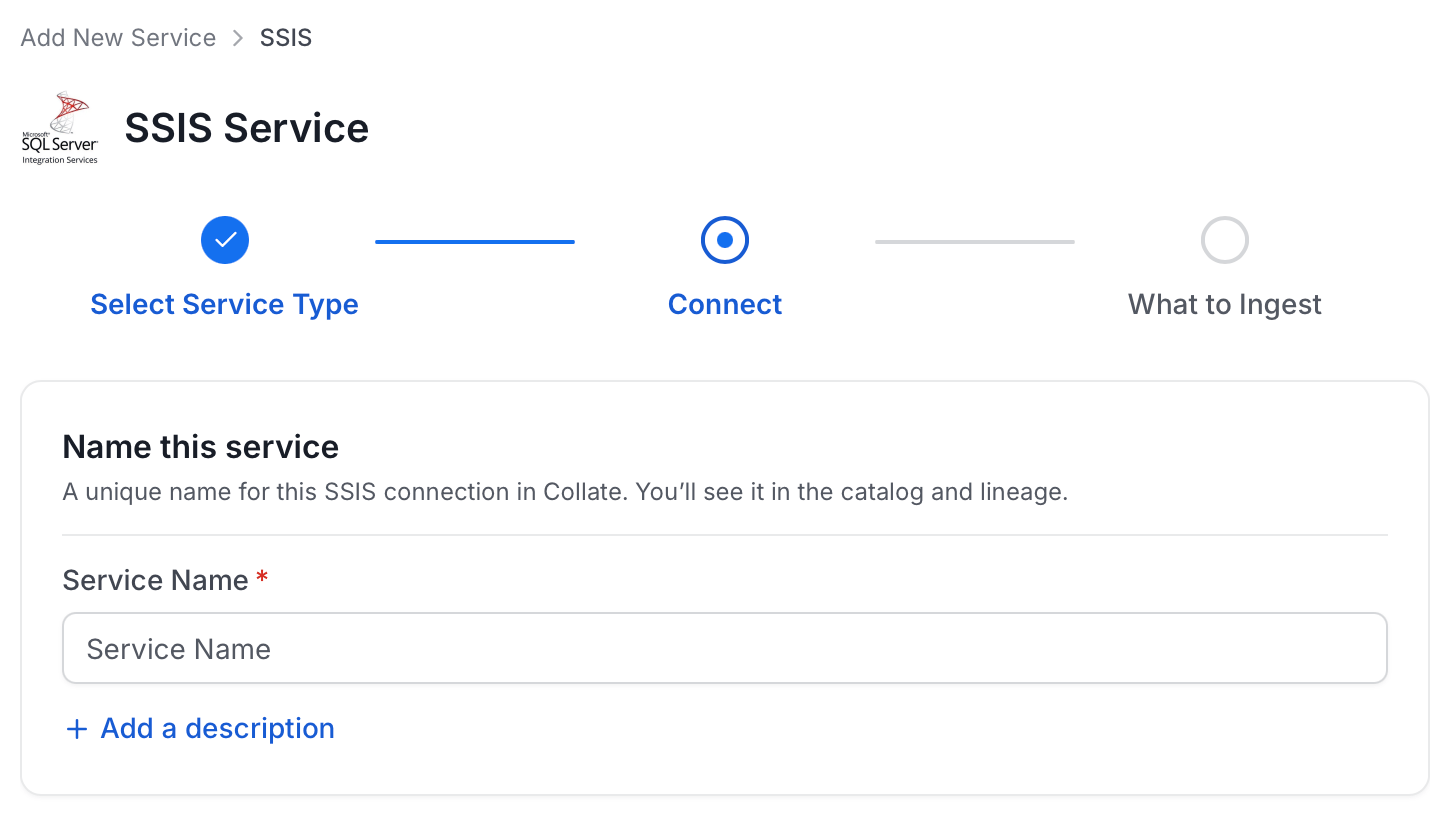
Note: The service name can’t be changed after you set it.
Step 4: Configure Connection Options
Specify where ingestion runs, provide your source credentials, and verify the connection.Select Ingestion Runner
Select an Ingestion Runner: the runner where the ingestion pipeline will execute.
Enter Connection Details
Enter the connection details for SSIS. The right-hand panel in the UI displays inline help for each field.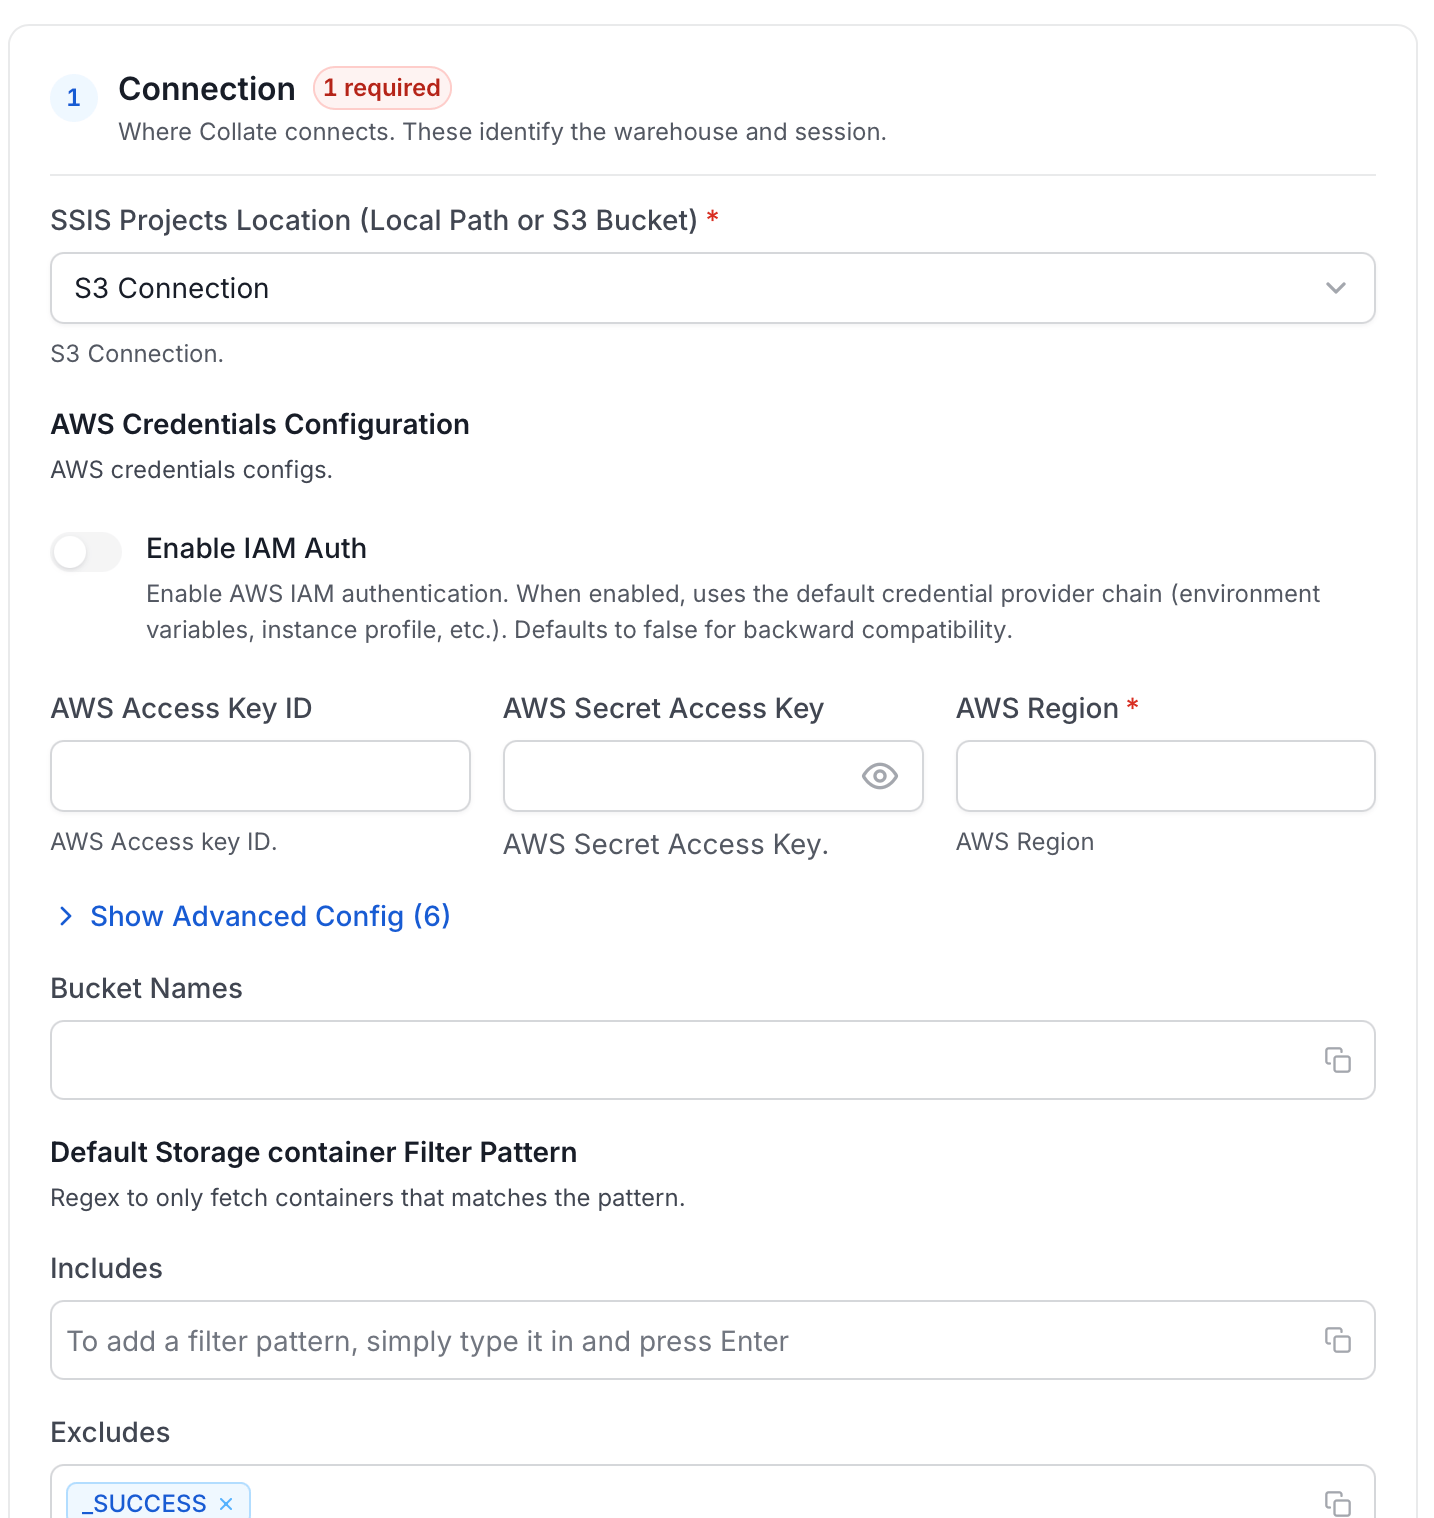
-
Metadata Database Connection: Optional. The
SSISDBconnection that provides pipeline run history. Leave it empty to run in file-only mode. The connector supports the followingconnectionselections:- Microsoft SQL Server: To connect to the SSIS metadata database:
- Provide the SQL Server connection credentials including username and password. The login needs the SSISDB Permissions.
- Specify the database name where SSIS metadata is stored.
- Enter the host and port for the SQL Server instance.
- Microsoft SQL Server: To connect to the SSIS metadata database:
-
SSIS Projects Location: Where the connector reads the SSIS package files (
.dtsx) from. Task dependencies and lineage come from these files. Select one of the following options. The connector finds packages at any depth of the location, as described in Package Folder Layout.-
S3 Connection: Read the packages from an Amazon S3 bucket or S3-compatible storage.
- AWS Access Key ID and AWS Secret Access Key: The credentials of an AWS Identity and Access Management (IAM) user or role with the S3 permissions.
- AWS Region: The region of the bucket, for example
us-east-2. - Endpoint URL: Optional. Set it for S3-compatible storage.
- Bucket Names: The bucket that holds the packages, for example
ssis-packages. The connector reads only the first bucket in the list.
-
ADLS Connection: Read the packages from an Azure Blob Storage container. This works for both Blob Storage and Data Lake Storage Gen2 accounts.
- Client ID: The Application (client) ID of the App Registration with the Azure Blob Storage permissions.
- Client Secret: The client secret Value of the App Registration.
- Tenant ID: The Directory (tenant) ID of the App Registration.
- Storage Account Name: The name of the storage account, for example
ssispackages. Enter the name only, not the URL. - Container Name: The container that holds the packages. Required.
-
Local Projects Path: The folder that holds the packages, for example
/home/user/ssis-projects/. The user that runs the ingestion needs read access to it and all its subfolders.
-
S3 Connection: Read the packages from an Amazon S3 bucket or S3-compatible storage.
Note: If you are using the Local Projects Path option to provide your SSIS package files, you must run the ingestion workflow through the CLI instead of the UI. This is because the ingestion process needs direct access to your local filesystem, which is not available when running ingestion jobs from the UI or server.
Test Connection
- Click Test Connection to verify the credentials.
- After the test succeeds, click Save.

Step 5: Configure Ingestion Options
In the What to Ingest step, use filter patterns to control which assets Collate ingests from your pipeline service. Filter rules match pipeline names using the following match types.How Filter Patterns Work
- Include: Add one or more comma-separated values. Each value uses one of the following match types. Collate ingests only assets whose names match at least one rule. Leave blank to include all assets.
- Exclude: Add one or more comma-separated values. Each value uses one of the following match types. Collate skips any asset whose name matches a rule. Leave blank to exclude nothing.
- contains: matches any name containing the value. For example,
salesmatchesmy_sales_dataandsales_2024. - starts with: matches names beginning with the value. For example,
prod_matchesprod_dbandprod_schema. - ends with: matches names ending with the value. For example,
_rawmatchesevents_rawandlogs_raw. - is exactly: matches the exact name only. For example,
analyticsmatches onlyanalytics. - matches regex: matches names using a regular expression. For example,
^prod_.*_v\d+$matchesprod_events_v1.
Filter Options
The Pipeline section includes the following filter options:- Pipeline: Controls which pipelines (DAGs, jobs, or workflows) Collate ingests from the source.
- Scan Mode: Choose between the following scan modes:
- Scan all: Ingests every asset of that type the connector can access. This is the default.
- Only specific: Enables include rules so only assets matching at least one rule are ingested.
- Exclude system toggle: Use this toggle to filter out system-reserved names defined by the connector for that asset type.
- Always exclude: Add permanent exclusion rules (shown in red). Assets matching these rules are never ingested, regardless of include rules.
- Preview: Shows a real-time summary of what will be in scope based on your current rules.
- Include rules: In Only specific mode, click + Add to define a rule. Added rules appear as chips. An asset is included if it matches any rule.
Step 6: Create & Deploy
Click Create & Deploy to deploy the agent and start the first metadata ingestion run. Collate saves the service configuration and immediately begins pulling metadata from the source. To monitor ingestion progress or view the service you just added, go to Settings > Services and select your service.Configure Metadata Agent and Schedule Ingestion
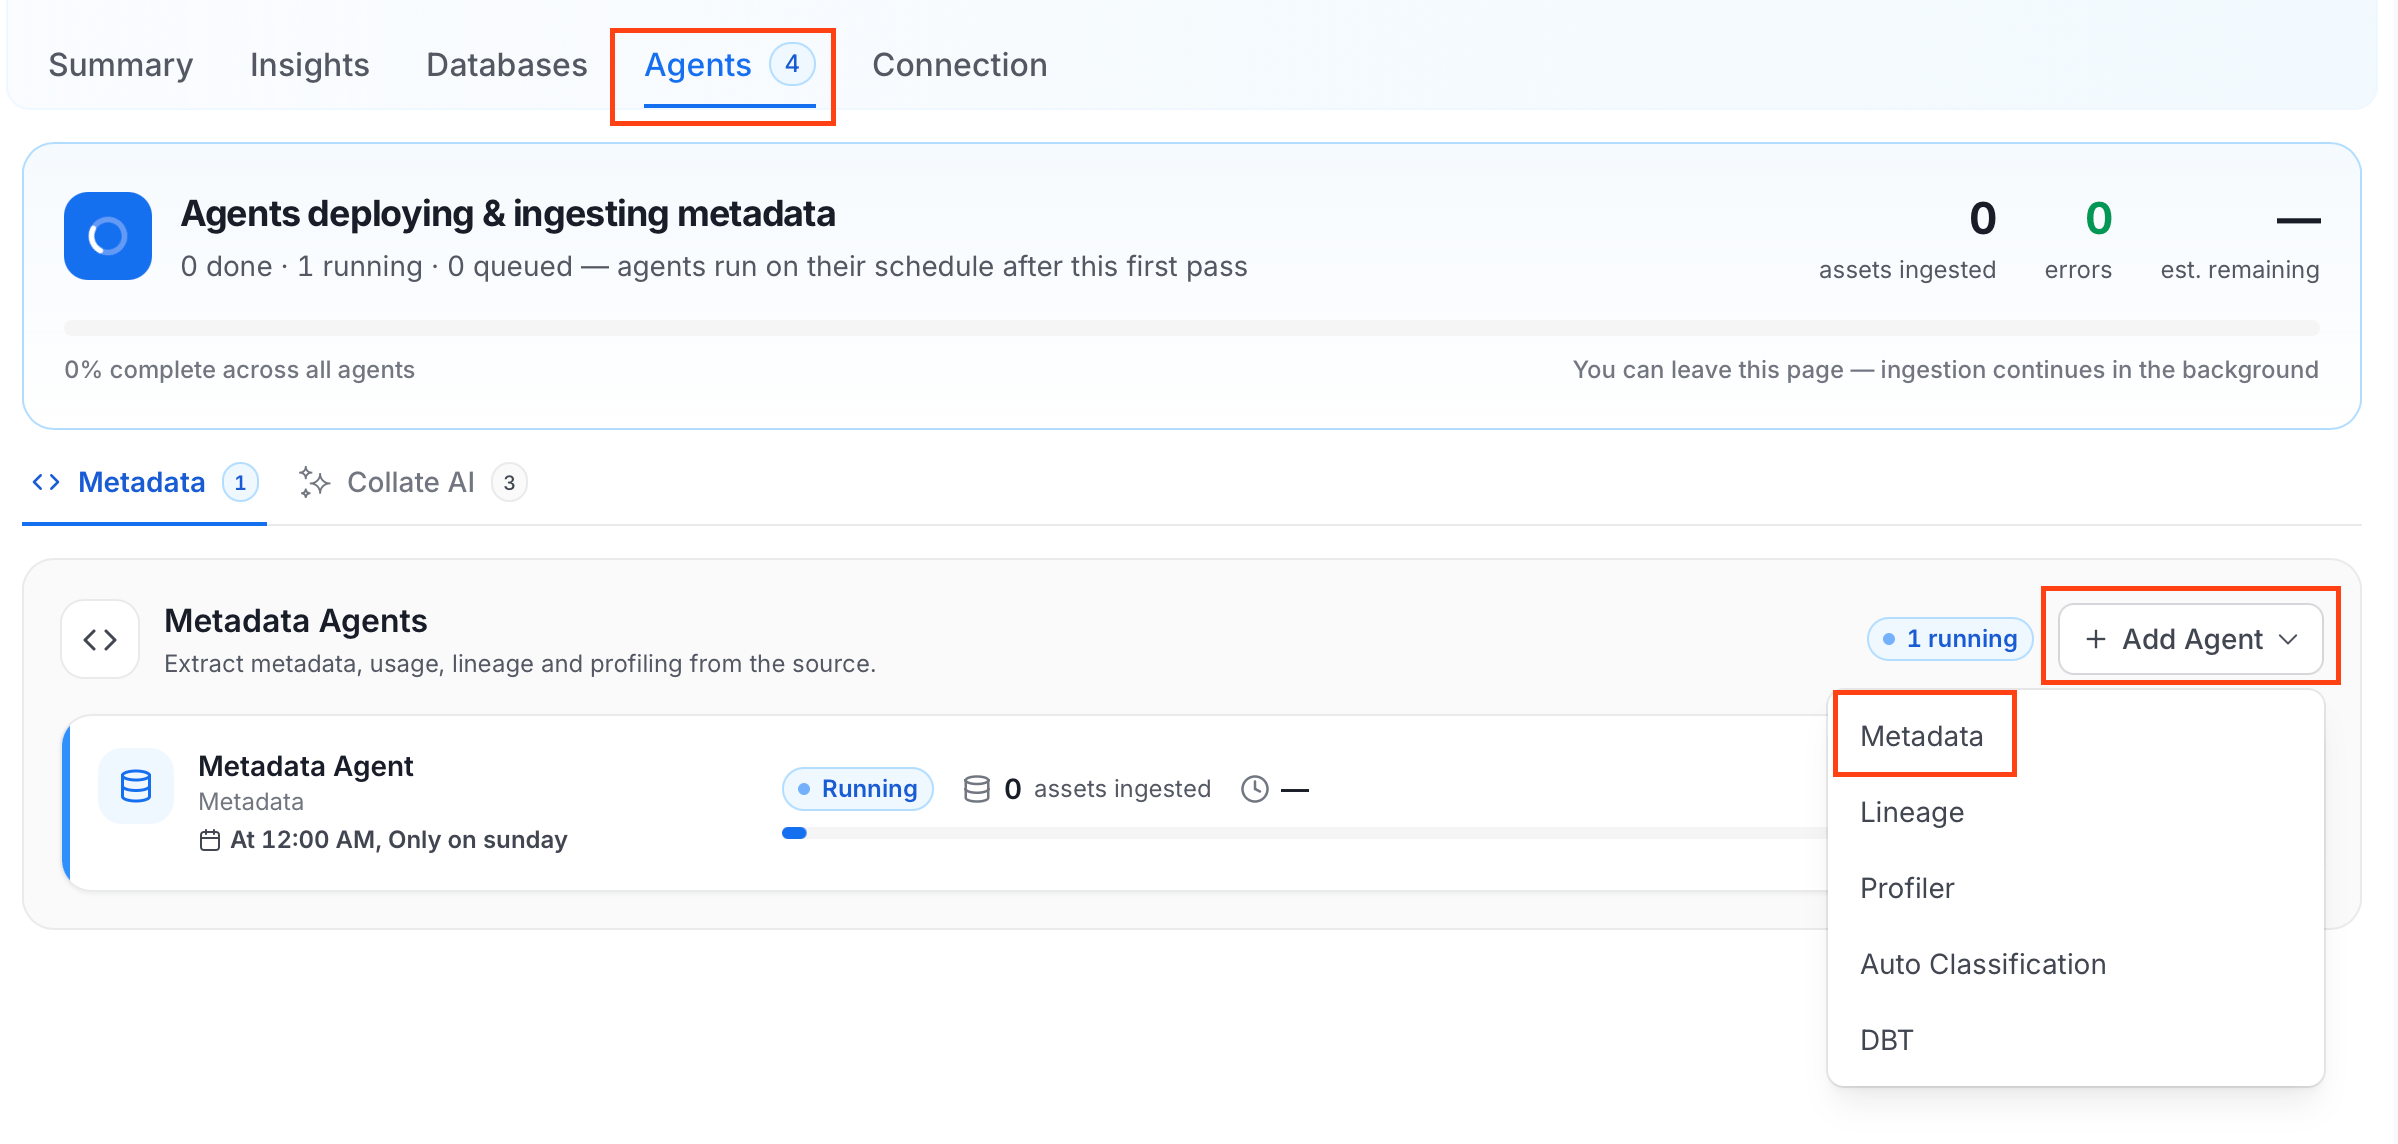
The Metadata Agent extracts pipelines, tasks, and other structural metadata from your source and keeps your Collate catalog in sync. It powers discovery, lineage, and governance across your data assets. When you click Create & Deploy, Collate automatically deploys a Metadata Agent for this service and triggers the first ingestion run. View its status and run history from the Agents tab on the service detail page. To configure the additional Metadata Agent and schedule ingestion, follow these steps:- Navigate to Settings > Services and select the Pipelines service.
- Select your service and click the Agents tab.
-
Click Add Agent and select Metadata from the dropdown.
-
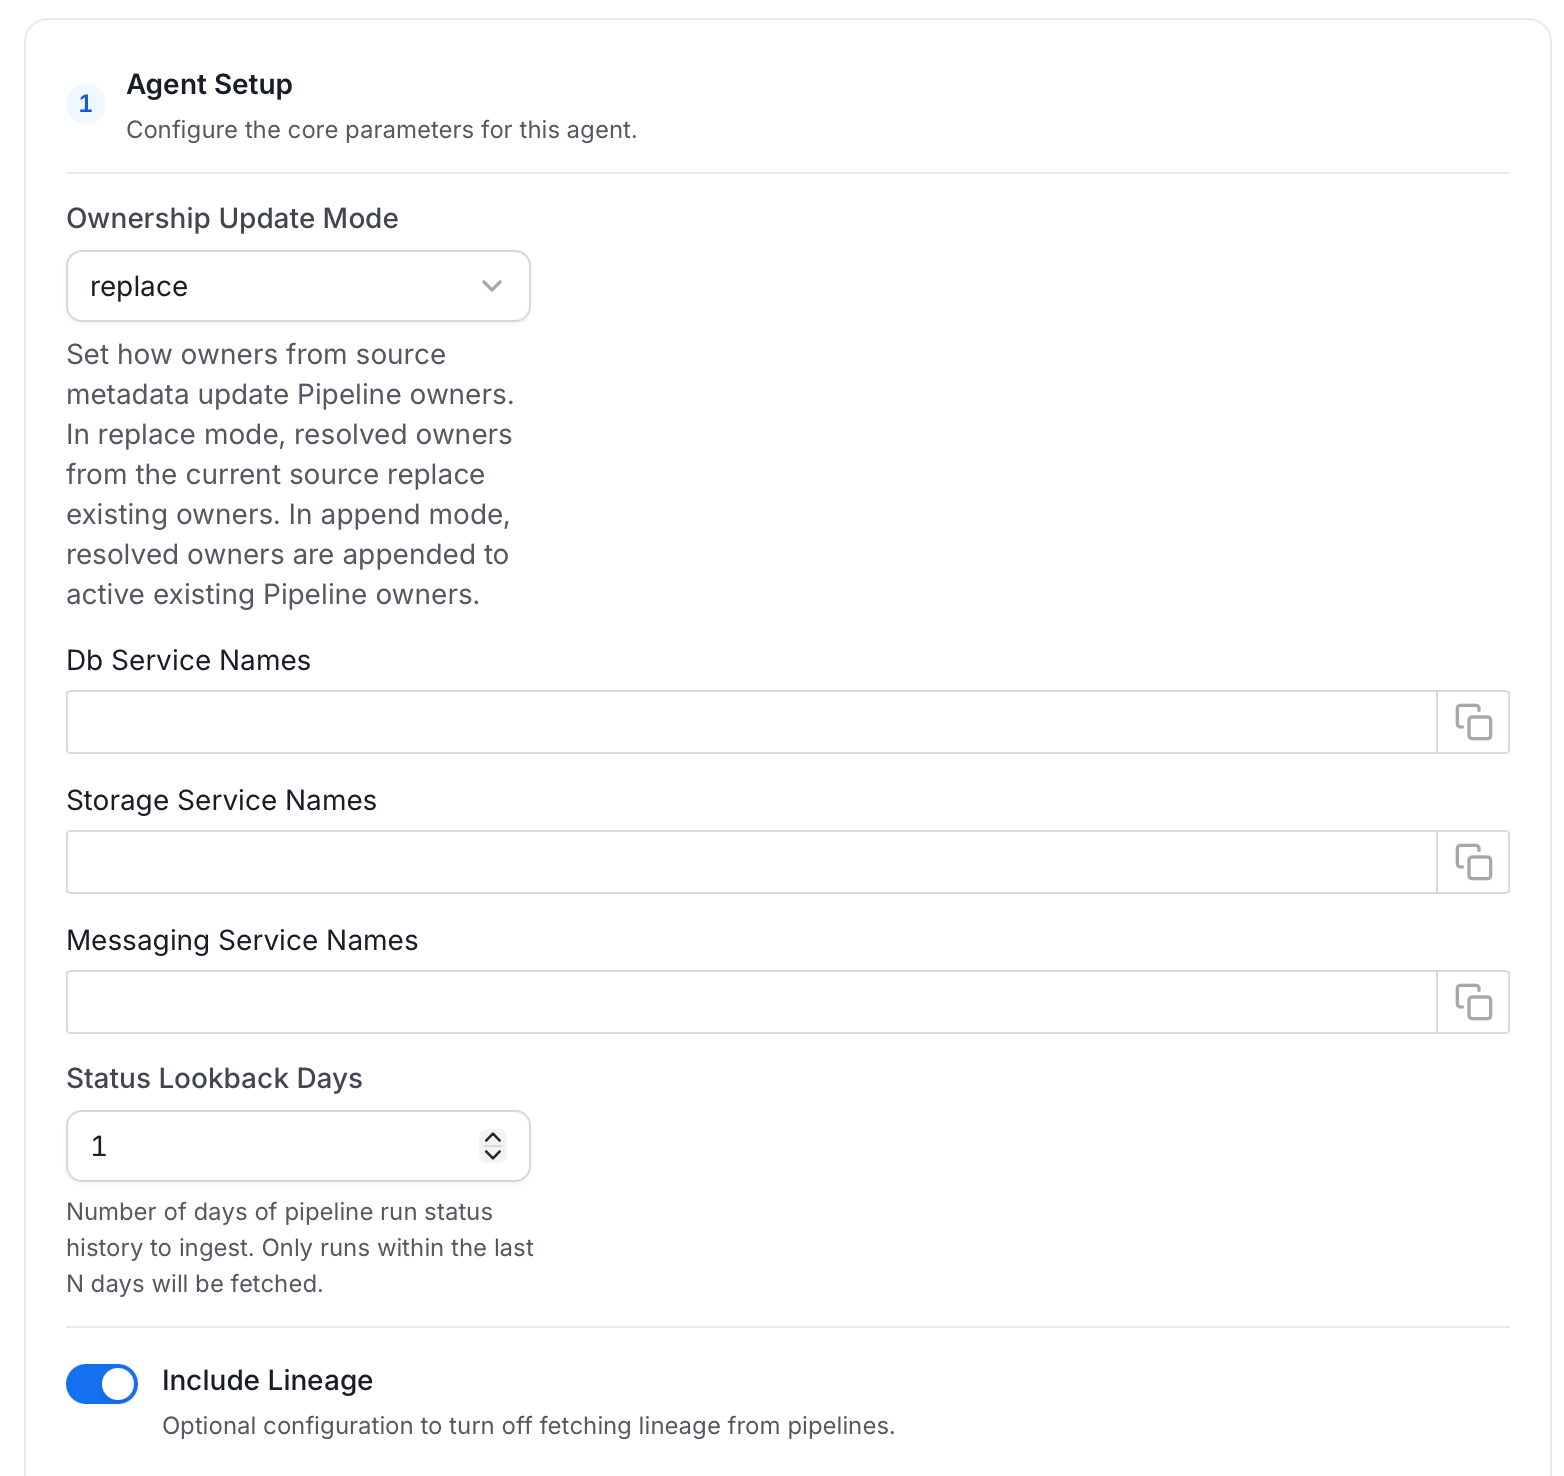
On the Configure Ingestion page, do the following and click Next.
-
Name this Ingestion: Enter a unique, recognizable name for this ingestion pipeline.

-
Agent Setup: Configure the core parameters for this agent. The following fields are available:
-
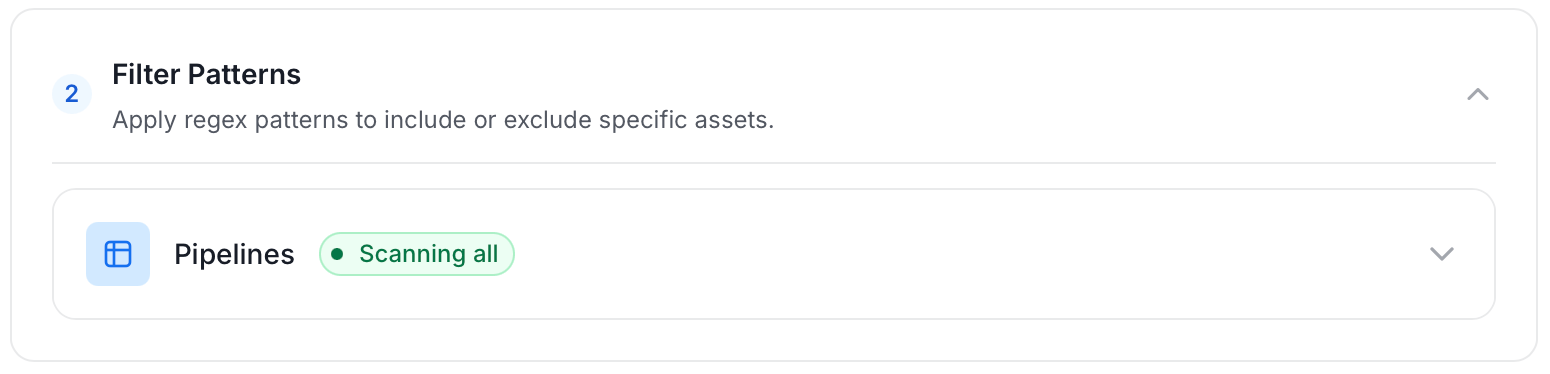
Filter Patterns: Apply include or exclude rules to scope which pipelines this agent ingests. These follow the same filter options described in Step 5.
-
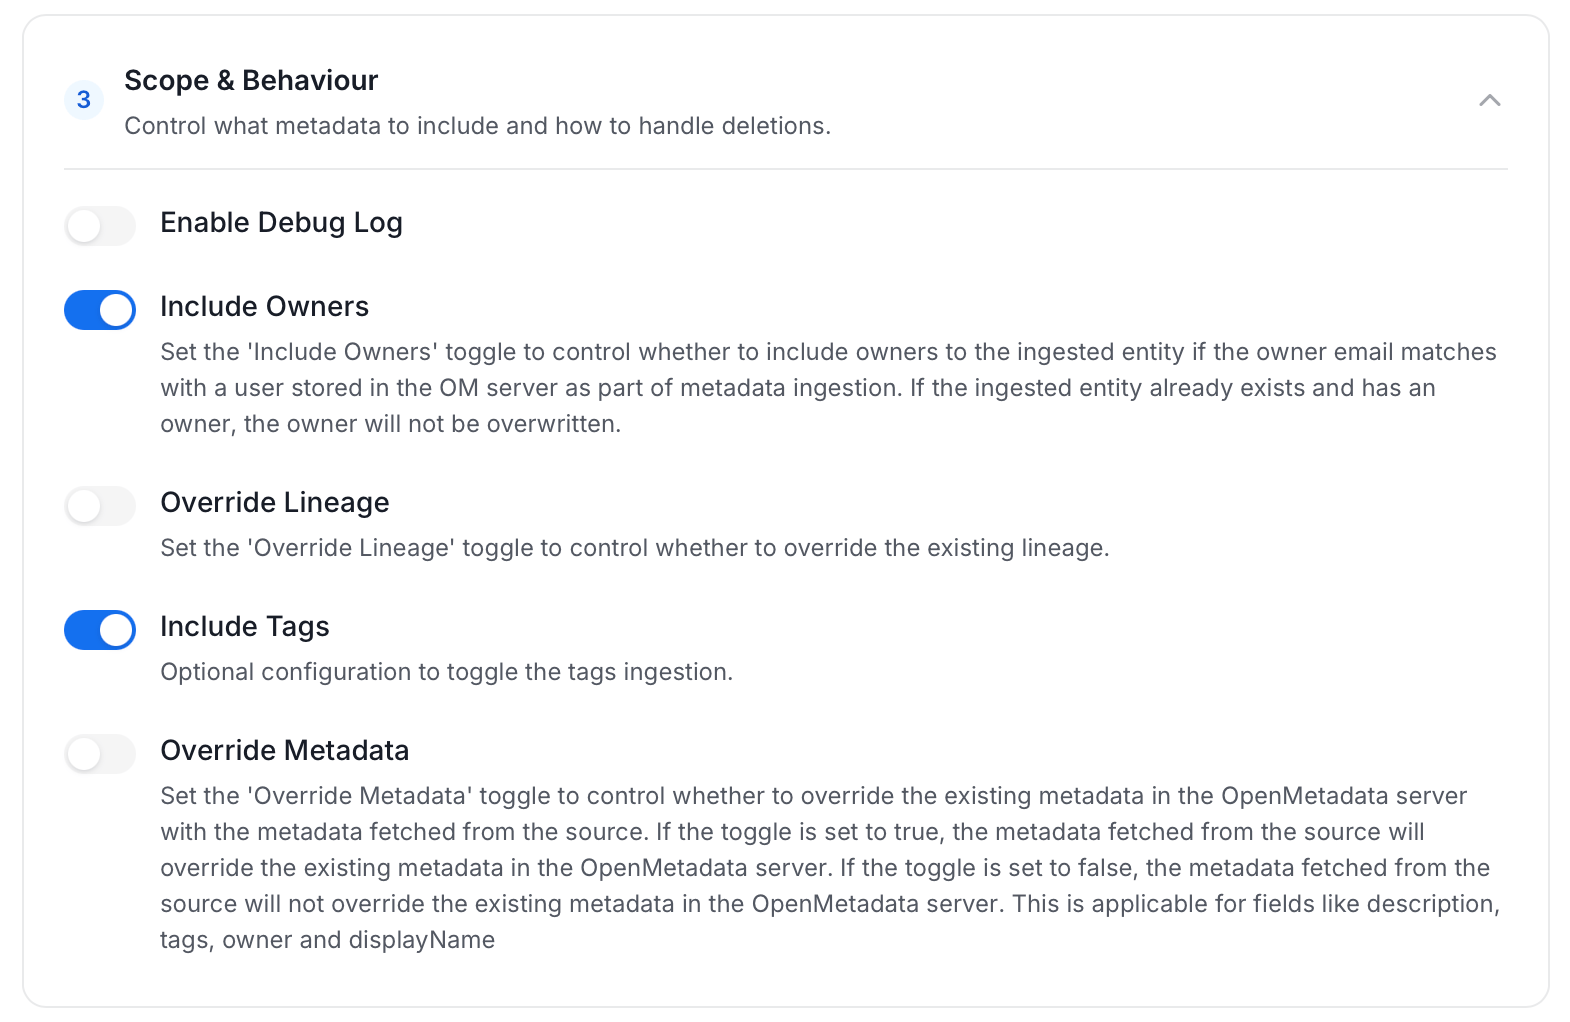
Scope & Behaviour: Control what metadata to include and how to handle deletions. Toggle each option on or off based on your needs:
-
Name this Ingestion: Enter a unique, recognizable name for this ingestion pipeline.
-
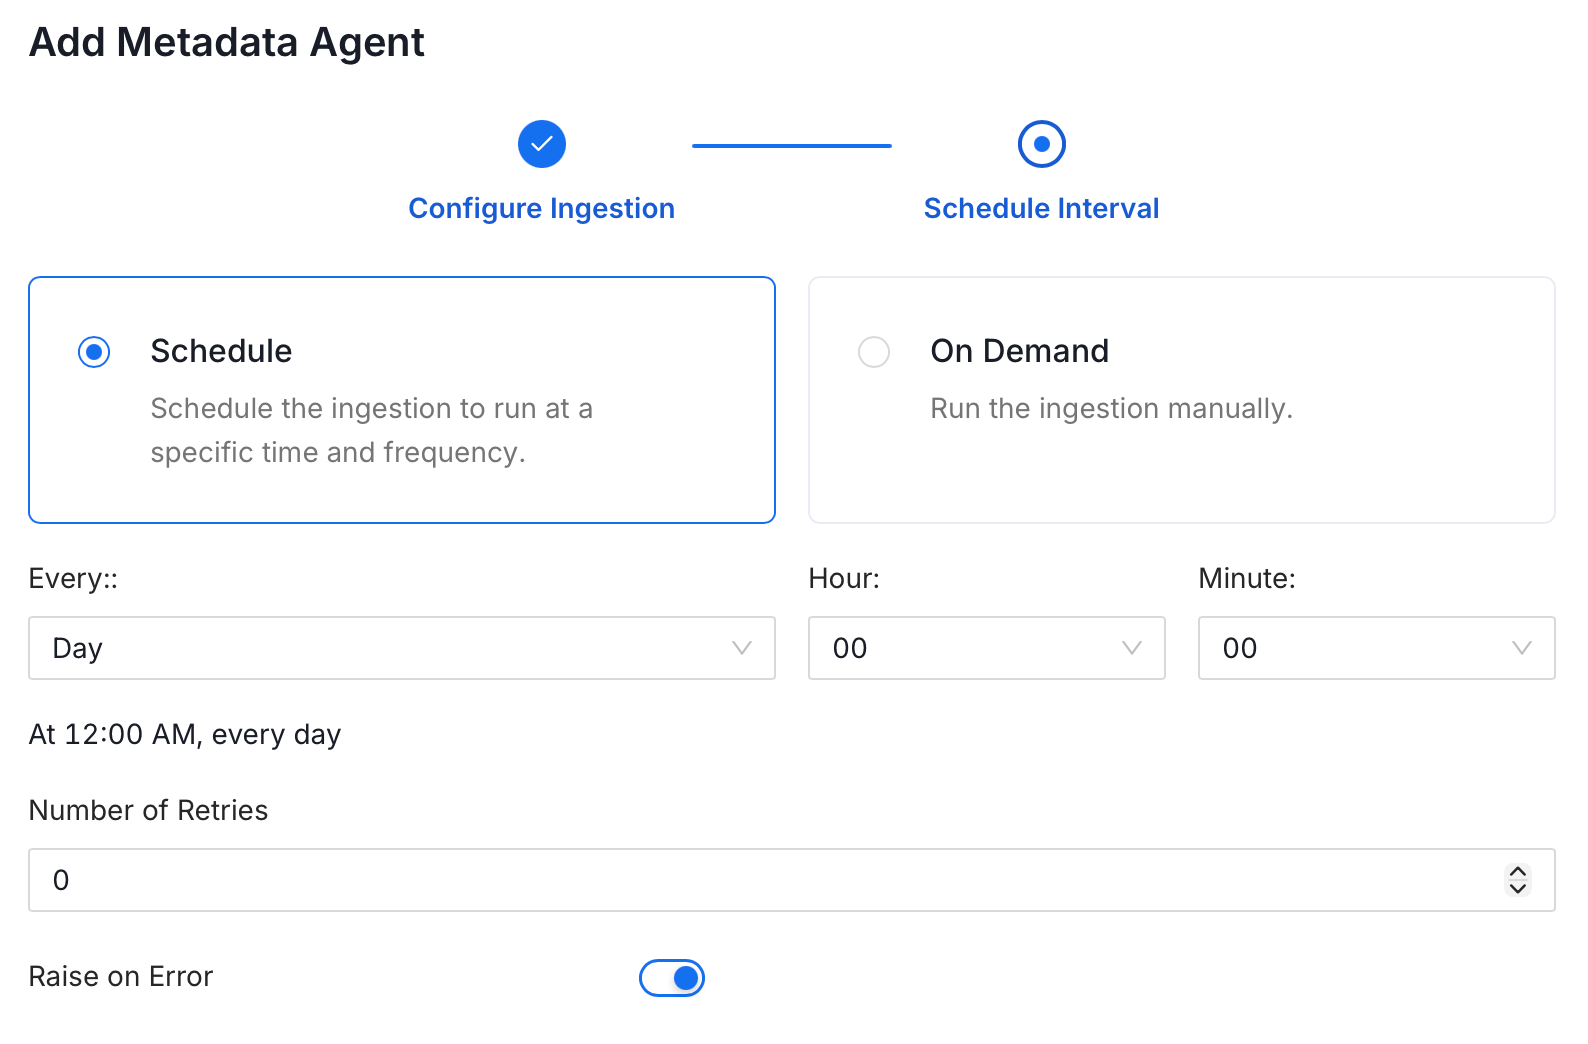
On the Schedule Interval page, set when the agent runs:
- Schedule: Choose a preset interval (Hourly, Daily, Weekly, Monthly) or enter a custom cron expression.
- On-Demand: No automatic schedule. Trigger the agent manually when needed.
- Click Add to deploy the agent.
Troubleshooting
SSIS Troubleshooting
Learn more about how to troubleshoot common SSIS connector issues and resolve configuration or ingestion errors.