Just like other services (Database, Pipelines, Dashboards, Messaging, and so on), it’s possible to create a Custom Drive Connector to bring metadata from a storage or file system-like service into Collate.This guide walks through how to implement your own Custom Drive Connector by extending the ingestion framework. The implementation pattern follows other service types closely, making the transition smooth for anyone familiar with the ecosystem.
This guide is based on a working example in the OpenMetadata Demos repository: link.
Watch Collate’s Webinar on Custom Connectors to get more context on how to build these integrations.
You need to yield CreateEntityRequest objects wrapped in an Either type. This pattern handles both successful entity creation and errors.Import necessary types:
To run your Custom Drive Connector inside Docker (for example, with Airflow or directly from the UI), the ingestion image must include your module.Dockerfile example:
This ensures that your code is baked into the ingestion container. Always align the ingestion image tag with the Collate version that is running your server/UI.
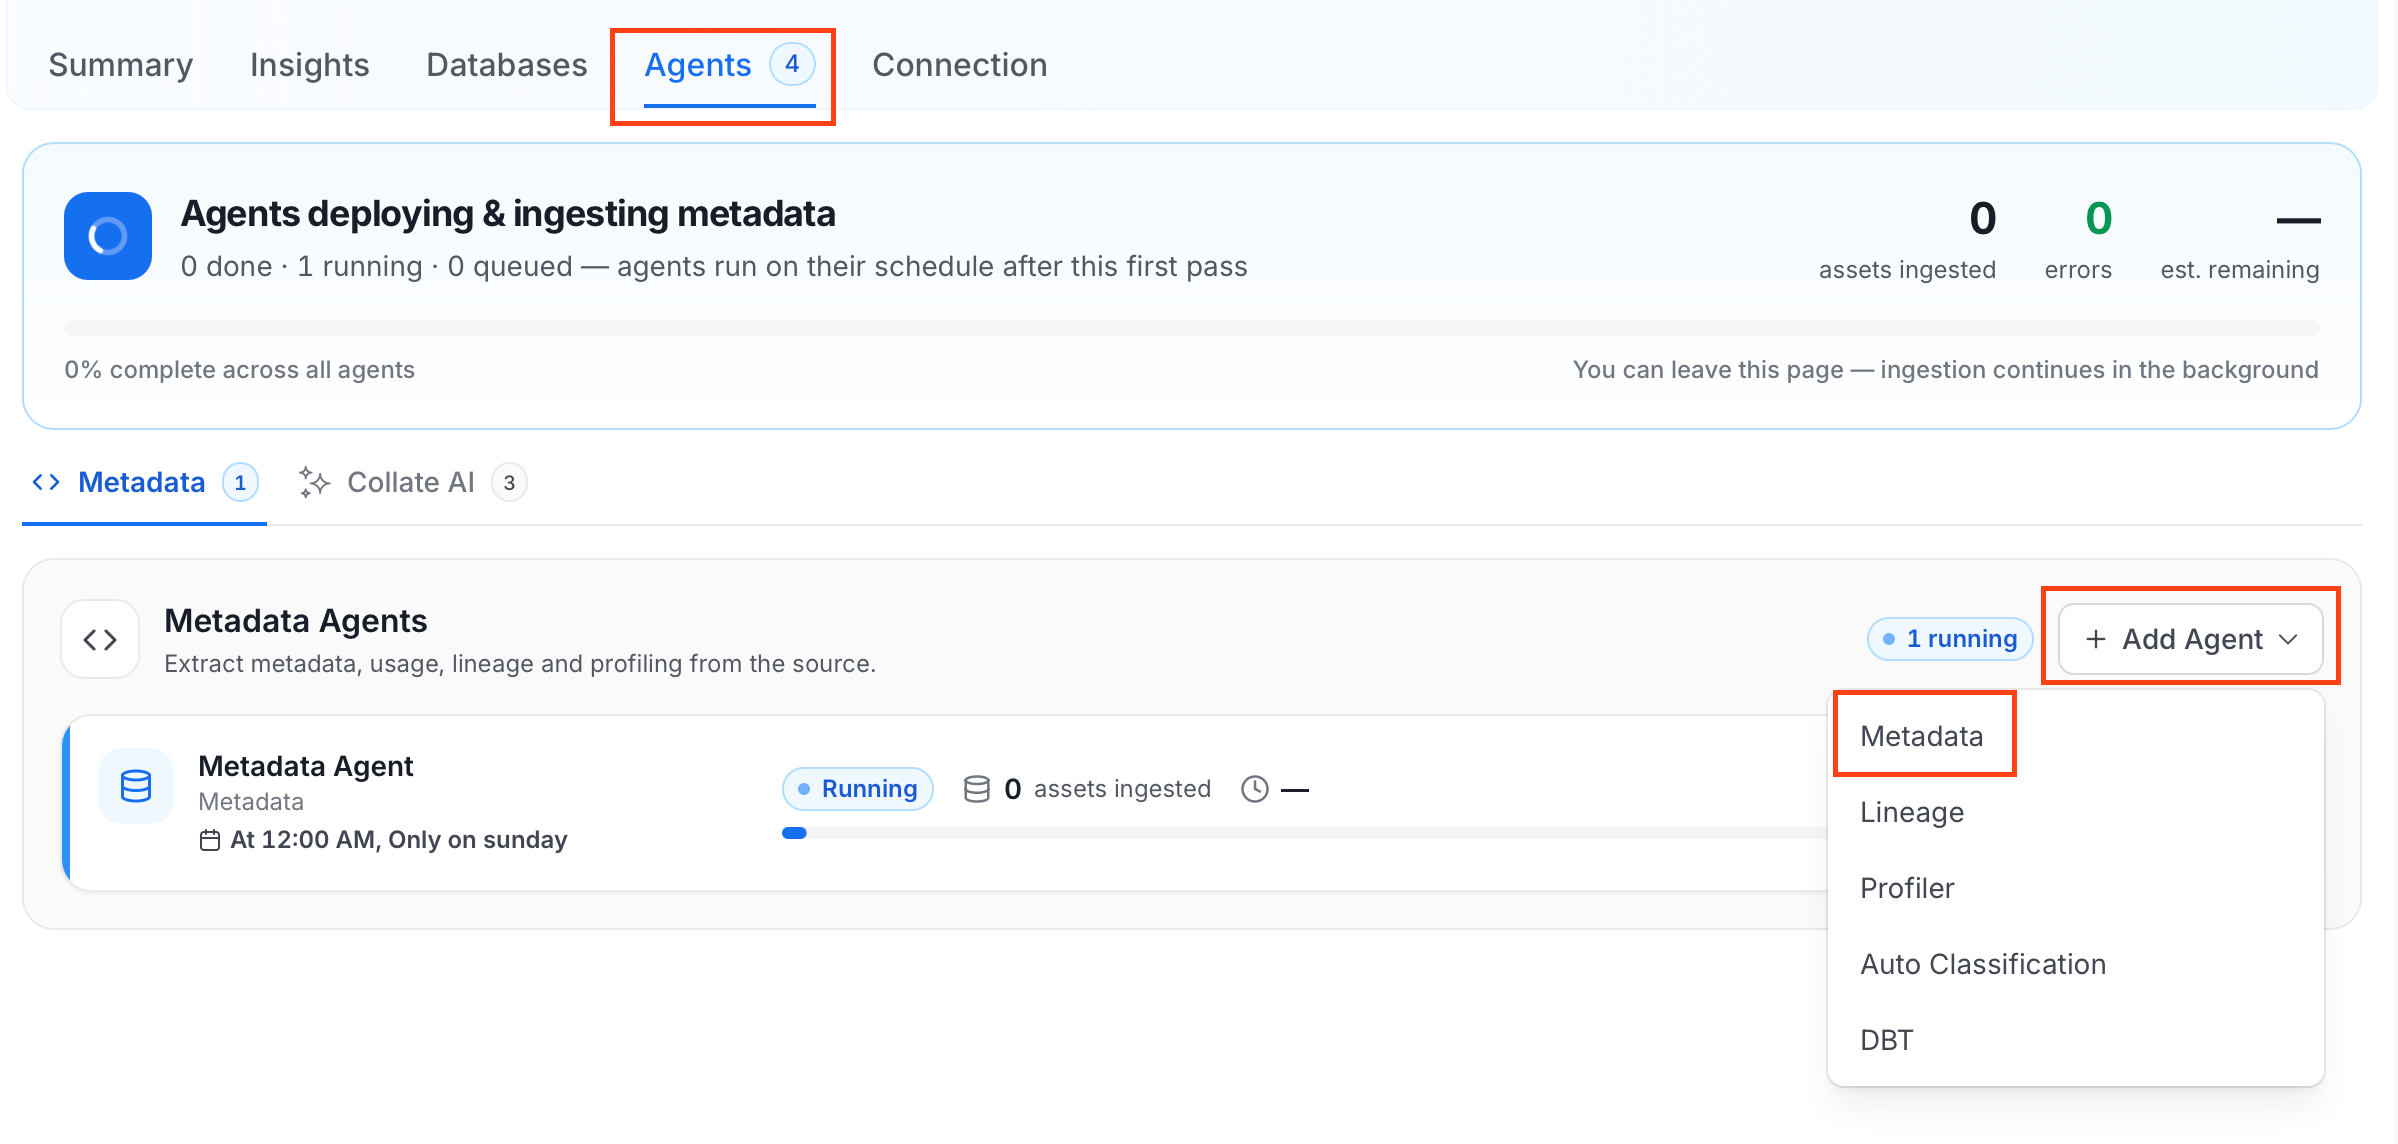
The Metadata Agent extracts directories, files, spreadsheets, and other structural metadata from your source and keeps your Collate catalog in sync. It powers discovery, lineage, and governance across your data assets.When you click Create & Deploy, Collate automatically deploys a Metadata Agent for this service and triggers the first ingestion run. View its status and run history from the Agents tab on the service detail page.To configure the additional Metadata Agent and schedule ingestion, follow these steps:
Navigate to Settings > Services and select the Drives service.
Select your service and click the Agents tab.
Click Add Agent and select Metadata from the dropdown.For some services, the dropdown is not available and clicking Add Agent takes you directly to the agent configuration page.
On the Configure Ingestion page, do the following and click Next.
Name this Ingestion: Enter a unique, recognizable name for this ingestion pipeline.
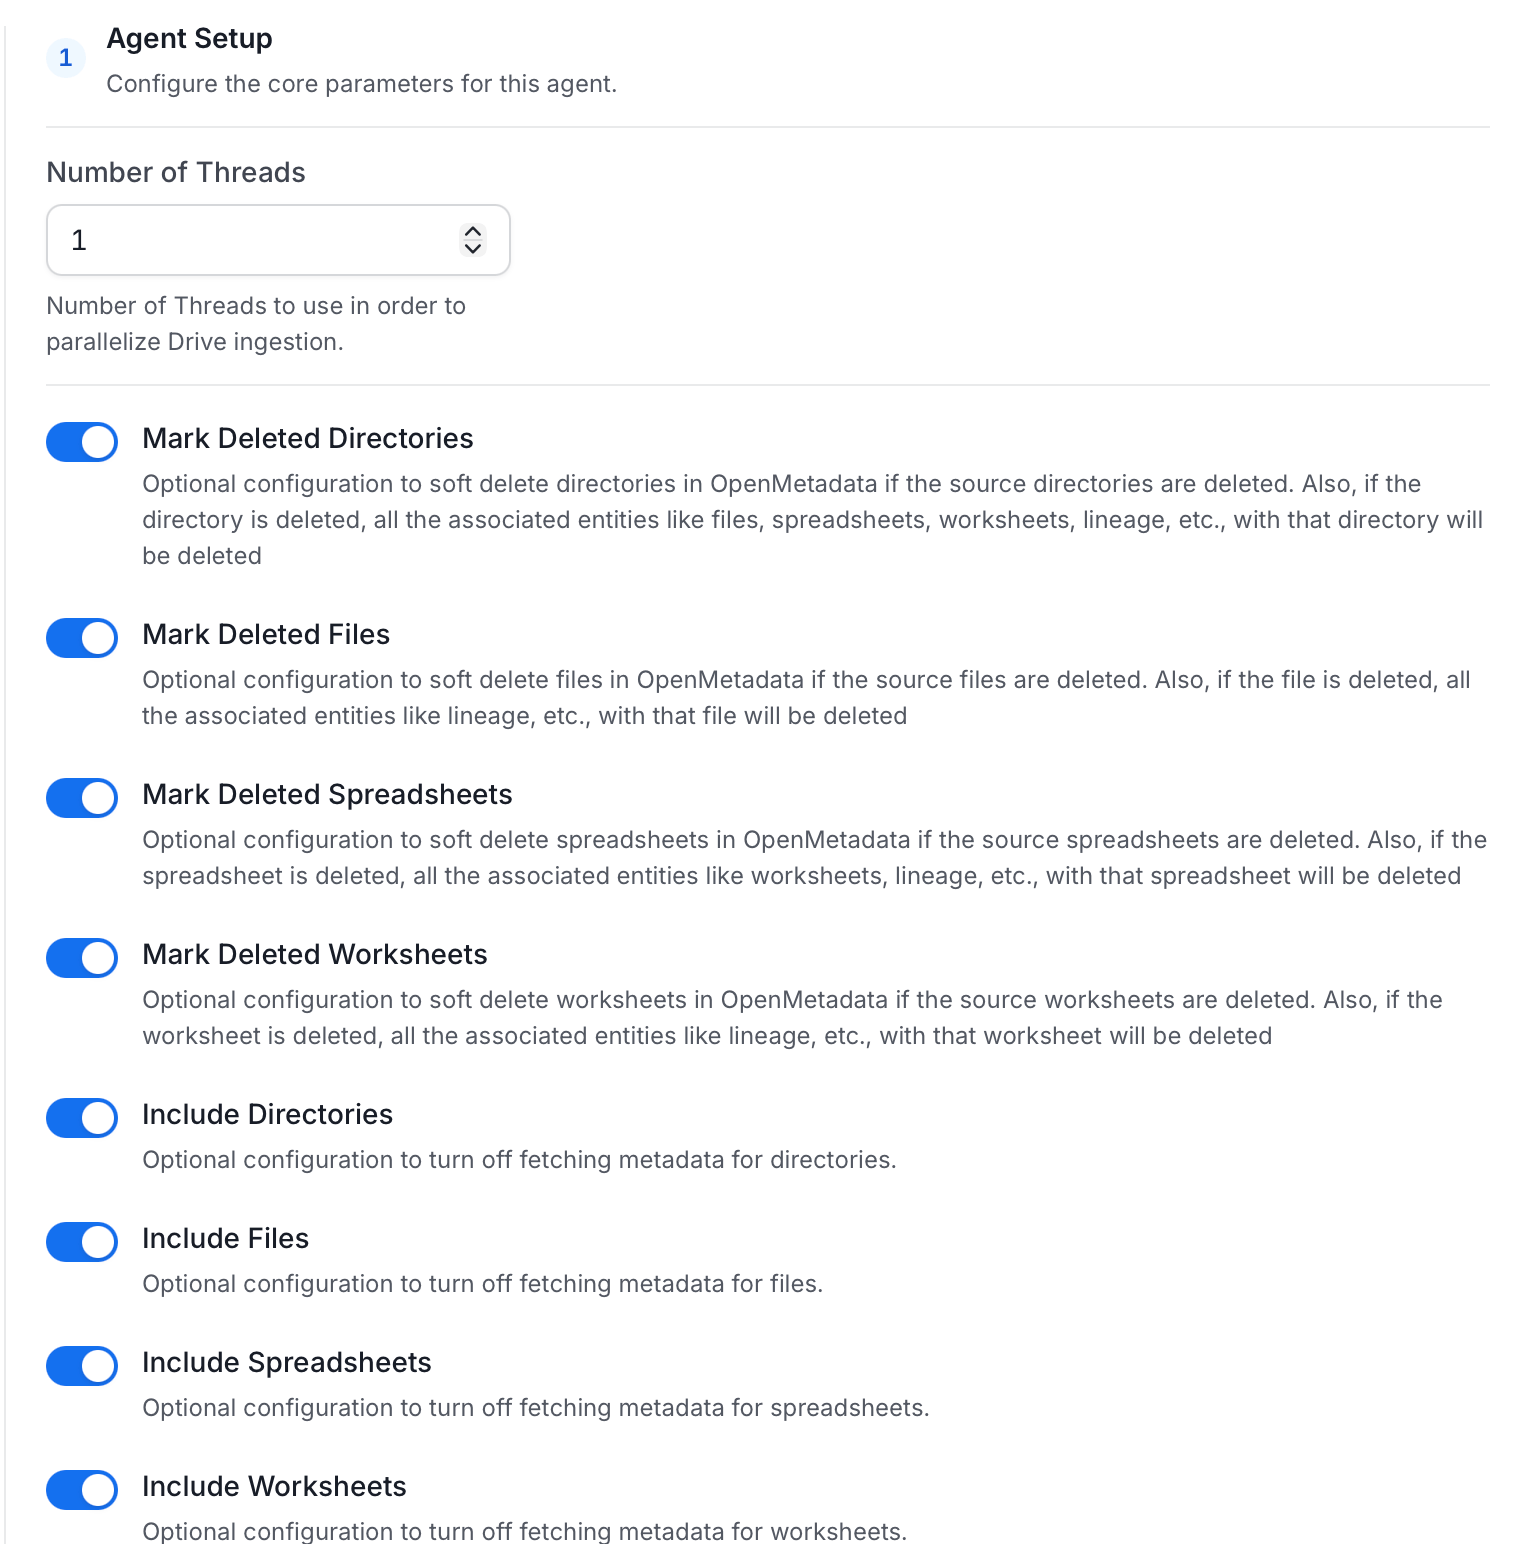
Agent Setup: Configure the core parameters for this agent. The following fields are available:
Field
Default
Description
Number of Threads
1
Number of threads to use for parallel drive ingestion.
Mark Deleted Directories
On
Soft-delete directories in Collate when they are removed from the source. Associated entities like files, spreadsheets, worksheets, and lineage are also deleted.
Mark Deleted Files
On
Soft-delete files in Collate when they are removed from the source. Associated entities like lineage are also deleted.
Mark Deleted Spreadsheets
On
Soft-delete spreadsheets in Collate when they are removed from the source. Associated entities like worksheets and lineage are also deleted.
Mark Deleted Worksheets
On
Soft-delete worksheets in Collate when they are removed from the source. Associated entities like lineage are also deleted.
Include Directories
On
Fetch directory metadata. Turn off to skip directories entirely.
Include Files
On
Fetch file metadata. Turn off to skip files entirely.
Include Spreadsheets
On
Fetch spreadsheet metadata. Turn off to skip spreadsheets entirely.
Include Worksheets
On
Fetch worksheet metadata. Turn off to skip worksheets entirely.
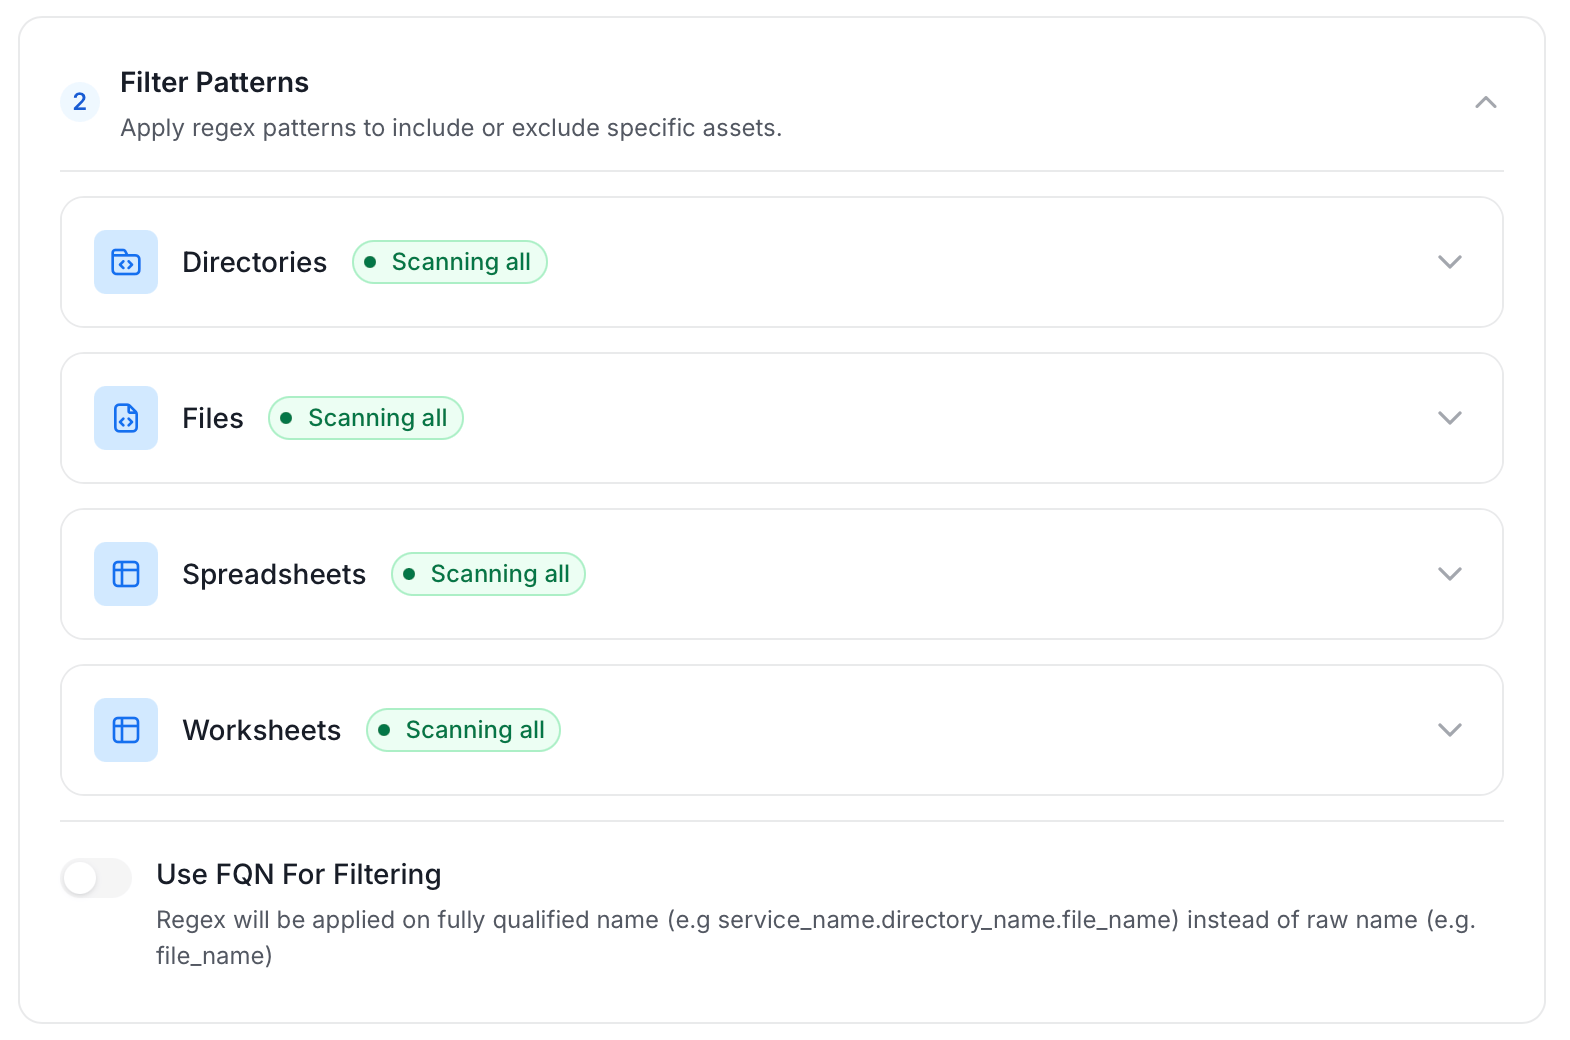
Filter Patterns: Apply include or exclude rules to scope which directories, files, spreadsheets, and worksheets this agent ingests. Use fully qualified name (FQN) filtering to apply a regular expression to fully qualified names (for example, service_name.directory_name.file_name) instead of raw names. These follow the same filter options described in Step 5.
Scope & Behaviour: Control what metadata to include and how to handle deletions. Toggle each option on or off based on your needs:
Toggle
Default
Description
Enable Debug Log
Off
Sets the ingestion log level to DEBUG. Useful for troubleshooting.
Include Tags
On
Ingest tags from the source.
Include Owners
Off
Assign owners from the source when the owner email matches a Collate user. Does not overwrite an existing owner.
Override Metadata
Off
When on, source values overwrite existing descriptions, tags, owners, and display names in Collate. A description or display name that the source doesn’t send never replaces an existing value. When off, Collate only updates fields that have no existing value.
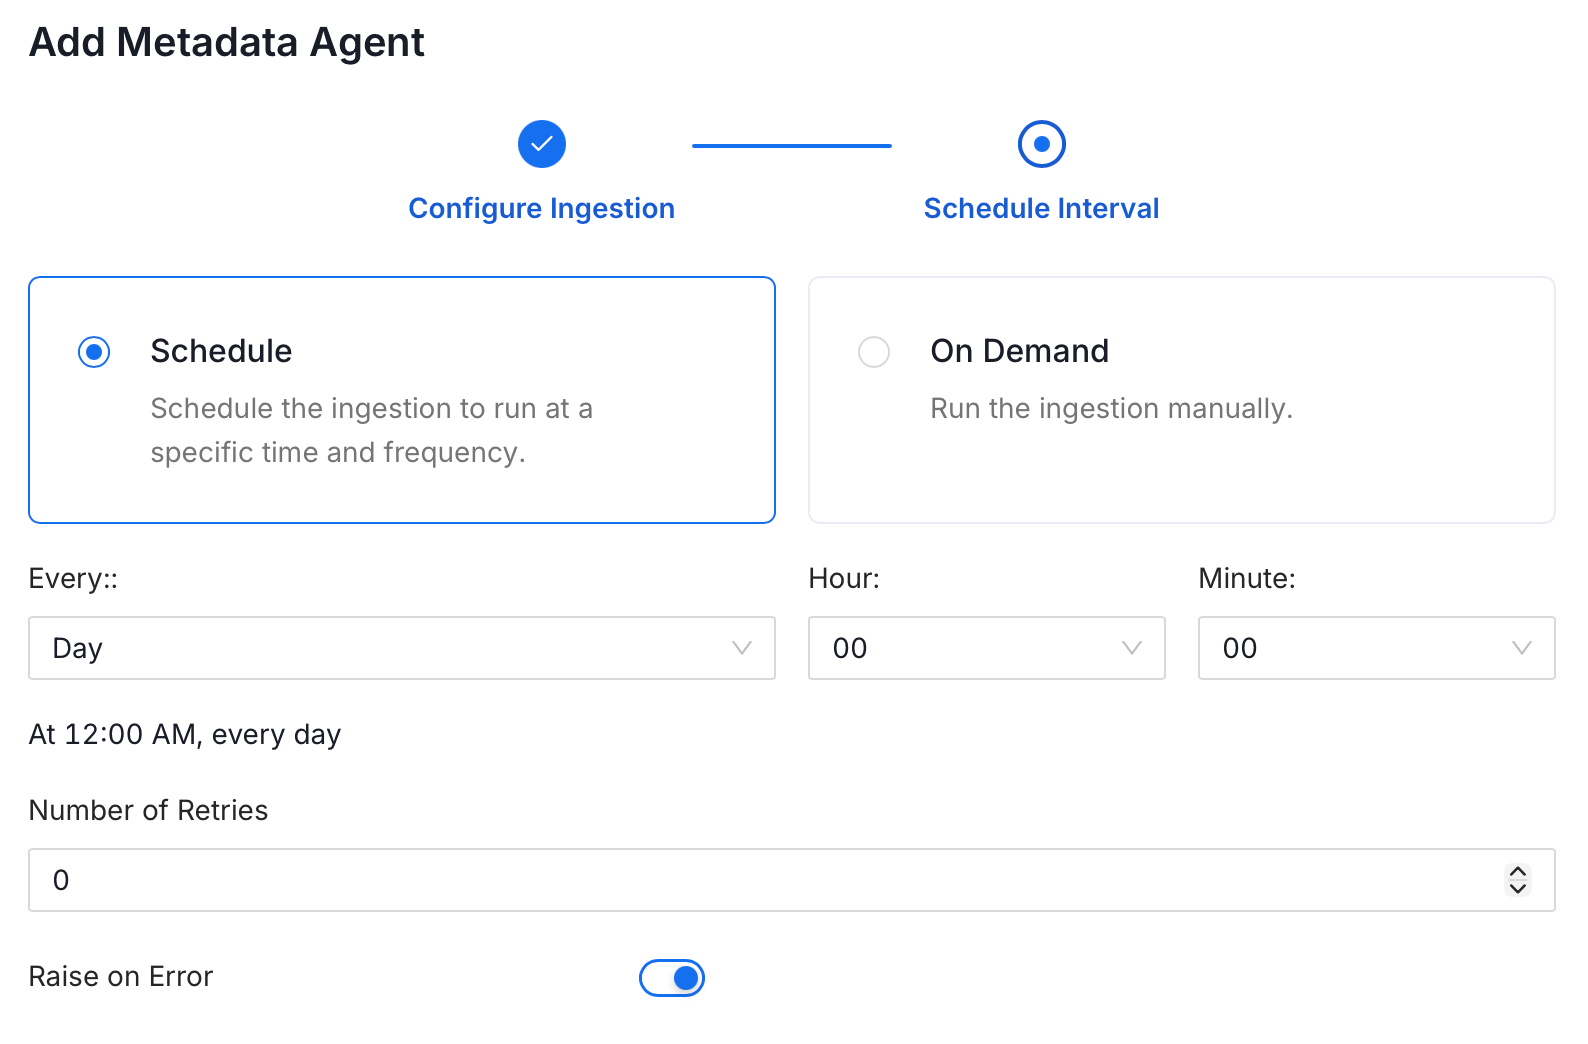
On the Schedule Interval page, set when the agent runs:
Schedule: Choose a preset interval (Hourly, Daily, Weekly, Monthly) or enter a custom cron expression.
On-Demand: No automatic schedule. Trigger the agent manually when needed.
Click Add to deploy the agent.
Was this page helpful?
Assistant
Responses are generated using AI and may contain mistakes.